

Bridging clip details are small on the drawing but large in consequence. When chosen or specified incorrectly they cause misfits at installation, compromised bracing, unintended structural demands, and acoustic problems where isolation is required. This article gives contractors, architects and engineers a focused checklist of questions to ask and mistakes to avoid so the bridging clip detail you specify will match stud geometry, installation practice and project environment.
What is a bridging clip and which types matter
A bridging clip is a small metal connector that ties adjacent studs or connects a stud to a bridging channel or track to provide lateral bracing and load distribution. Not all clips perform the same function. At a minimum, identify whether the clip is a bracing-only clip, a load-transferring clip, or a kit that includes spacers, fasteners and washers. Manufacturer product pages list intended use and part variants, so start there. See the Dass Metal Products bridging clip product page for examples of part variants and typical applications.
Clip types and typical profiles
- Bracing-only clips, used to stabilise stud webs and reduce buckling without intending to transfer axial loads.
- Load-transferring clips, engineered to transmit gravity or lateral forces across the connection and usually requiring explicit load tables or an engineered calculation.
- Combined clip kits, supplied with fasteners, spacers or isolation washers where acoustic or thermal breaks are required.
Industry guidance on beam and framing clip types underscores the importance of matching the clip family to the intended function and fixing method, because clip geometry changes how forces flow into the support member. For a concise comparison of clip families and fixing options see a quick guide to beam clips.
When to use a clip versus continuous bridging channel
Continuous bridging channel offers a continuous load path and predictable stiffness, which is often specified where code or an engineer requires a continuous bracing element. Clips are appropriate where intermittent bracing meets the structural requirement or where obstacles prevent continuous channel. Use continuous channel when the design calls for a uniform bracing line or when an engineer specifies a continuous load path.
Which compatibility checks should you run with studs, tracks and bridging channel
Before you approve a bridging clip detail, verify these physical compatibility items on the shop drawing and at first delivery.
Measure flange and web dimensions
- Confirm the clip bears on the stud flange or web as intended. Ask the supplier for a CAD section showing the clip engaged with the exact stud profile you specify.
- Provide stud series and flange width in the purchase specification, for example stud depth, flange width and gauge. A common source of field mismatch is assuming all “50 mm” or “54 mm” series studs share identical flange shapes.
Confirm clip-to-stud bearing area and interference
Ask for a cross-section drawing that shows the clip bearing area and any required clearance for fasteners. If the clip requires folded or crimped engagement, verify the supplier’s shop drawing includes the actual measured interference to avoid trimming or rework on site.
When you prepare the compatibility checklist and CAD requests, reference the supplier product page and any available data sheet to ensure dimensions match your stud supplier’s profiles.
What installation details, fasteners and tolerances must you specify
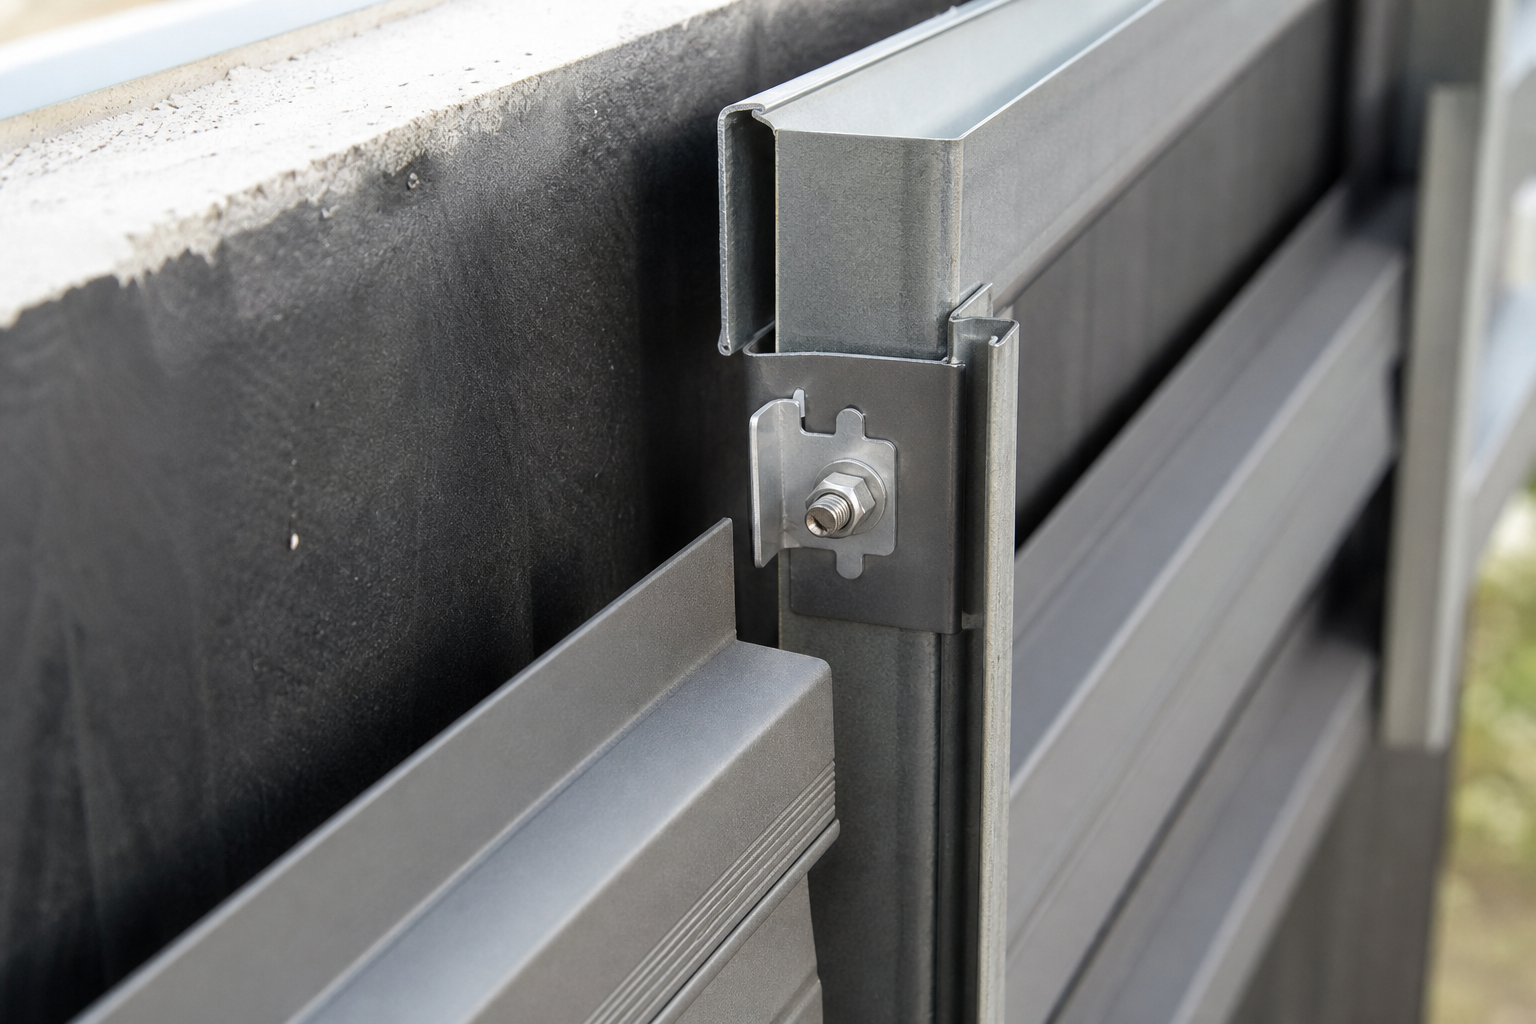
Fastener selection and clip orientation are frequent sources of failure. Get these items in writing from your supplier before manufacturing.
Recommended fastener families and thread types
- Request the manufacturer’s recommended fastener type, size and minimum embedment or thread engagement. The supplier should state whether self-drilling screws, wafer head screws or bolts are required for the clip-to-stud connection.
- Ask if fasteners are supplied preassembled in the clip kit and whether they have coatings compatible with the clip finish to prevent galvanic corrosion.
Spacing, edge distances and clip orientation
Specify clip spacing and the required edge distance from openings or end studs. On the shop drawing, check that clip orientation aligns with the installed framing sequence and does not obstruct adjacent finishes or services.
What on-site checks to perform at first install
- Confirm a trial install of the first ten clips or the first pack delivered. Verify engagement, fastener fit, and clearance for finishing work.
- Check fastener drive and pull resistance on sample clips to ensure the specified screw does not strip the thin gauge steel or pull out under initial tightening.
Manufacturer data sheets for bridging clips typically show fixing details and recommended fasteners, so request and keep the data sheet with the submittal. A typical bridging clip data sheet illustrates the technical fields you should expect from suppliers.
Do bridging clips carry load or only brace studs
The most common misunderstanding is assuming all bridging clips serve the same structural role. That assumption leads to under‑specified connections or to clips being loaded beyond their intended capacity.
When to require an engineered load check
If a detail is intended to transfer shear or axial load between studs, require the supplier to provide load tables or an engineer’s calculation. Do not assume a bracing clip can replace a specified load path without explicit documentation. For any load-transfer application seek either manufacturer load tables for the specific part or certification from an engineer.
How clips affect acoustic isolation assemblies
When bridging clips bridge an assembly that also uses resilient channels or isolation layers, they can create unintended acoustic bridges. Ask whether the clip design intentionally decouples the lining from the structure, or whether isolation washers or sacrificial gaps are required to preserve acoustic performance. If the project has acoustic targets, specify testing requirements or select clip kits designed for acoustic compatibility.
How should you verify corrosion protection and finish for the project environment
Finish and corrosion protection are project-critical. The wrong finish causes early rust at cut edges and fastener interfaces, especially in humid interiors or near the coast.
Finish callouts to include in the spec
- Specify the finish by manufacturer code and standard, for example a galvanizing class or an ASTM reference and coating thickness where applicable.
- For exposed or coastal installations request stainless options or a specific galvanizing class, and demand confirmation about cut-edge protection methods on shop drawings.
What to ask about cut-edge protection and fastener corrosion
Ask how the supplier protects cut edges and what fastener coating class is recommended for compatibility. If the clip and the fastener are different metals, request guidance on separate coatings or isolation methods to avoid galvanic reaction. Supplier product pages and data sheets will state finish options and typical project uses for each finish.
What supplier documentation must you request before signoff

Before you approve a bridging clip detail for production, require a clear set of deliverables from the supplier. Treat incomplete documentation as a procurement red flag.
Minimum datasheet fields
- Part number, material specification and finish class
- Dimensional drawing with installed section view and critical tolerances
- Recommended fastener type and minimum embedment or thread engagement
- Load tables or a clear statement the clip is bracing-only
How to request CAD and shop drawings
Ask for native CAD or DWG files and a PDF shop drawing that shows the clip in the intended assembly with dimensions and tolerances. Specify response times for submittal revisions so shop drawings do not delay fabrication or delivery.
What counts as an engineering submittal versus a product sheet
A product sheet is acceptable for bracing-only clips where no load is transferred. For any load-bearing application require an engineering submittal with calculations, and identify which party signs the calculation. The Government of Canada consumer checklist for supplier selection recommends getting comparable quotes and documented references when choosing among suppliers for technical purchases, which is good practice for spec-driven construction procurement.
Common mistakes, red flags and quick on-site verification steps
Top 6 mistakes seen in practice
- Specifying a generic clip without confirming it will bear correctly on the chosen stud flange.
- Ordering clips without confirming recommended fastener type, length and coating.
- Assuming bracing clips will safely transfer load without load tables or engineered approval.
- Failing to specify finish or cut-edge treatment for corrosive environments.
- Accepting supplier submittals that lack CAD, implied tolerances or clear orientation drawings.
- Not performing an on-site trial install to validate fit, clearance and fastener drive before full fit-out.
Supplier response red flags to watch for
- No CAD or shop drawings available on request.
- Vague or absent fastener recommendations.
- No load tables and refusal to sign an engineered statement for load-transfer applications.
- Unclear finish specification or inability to confirm coating class for the project environment.
- Unwillingness to provide sample parts or a trial kit for mock-up.
Decision criteria and the exact questions to ask before you specify
Use the checklist below as the purchaser’s rubric. If any answer is missing or ambiguous, request clarification before awarding the order.
- Compatibility: Which stud series, flange width and track depth is this clip designed for? Can you provide a CAD section showing the clip engaged to our stud profile? Please reference the supplier product entry, for example the Dass Metal bridging clip product page.
- Function: Is the clip bracing-only or load-transferring? If it transfers load provide load tables or an engineer-signed calculation.
- Fasteners: What fastener type, size and coating do you recommend? Are fasteners supplied as part of the clip kit?
- Tolerances: What are the manufacturing tolerances and installed clearances we must allow for? Provide these on the shop drawing.
- Finish: What finish options are available and what coating standard or thickness applies? How are cut edges treated?
- Documentation: Provide a product datasheet, CAD/DWG, shop drawing, MSDS if relevant, and lead time. Confirm whether metric and imperial dimensions are included.
- Mock-up and trial: Can you supply a small sample kit for a trial install on site and how long does that take to deliver?
- Logistics and warranty: What are lead times, cross-border delivery options, and warranty terms for material defects?
Frequently asked questions
What fasteners and lengths should I specify for bridging clips on light gauge studs
Fastener choice depends on clip thickness and stud gauge. Request the manufacturer’s recommended screw type and embedment dimension on the datasheet and confirm coating compatibility. If the supplier cannot supply a specific fastener recommendation and length on the submittal, treat that as a red flag and request a trial install.
Do bridging clips transfer structural load or only provide lateral bracing
Both types exist. Some clips are bracing-only while others are designed to transfer load. Always require the supplier to state the intended function and provide load tables or an engineer’s calculation if load transfer is claimed.
What minimum documentation must a supplier provide for bridging clip details
At minimum request a product datasheet with materials and finish, a dimensional CAD section showing installed clearance, recommended fasteners, and a statement about intended function. For load-carrying details require an engineering submittal.
How do I confirm the corrosion class and finish is appropriate for an exterior or humid interior project
Ask for the coating standard and thickness and verify the finish against the project exposure class. Request written confirmation of cut-edge protection and compatible fastener coatings on the shop drawing.
What are the top on-site checks to catch incorrect bridging clip deliveries early
Perform a trial install on the first delivery, verify clip fit to the actual stud profile, confirm fastener drive and thread engagement, and check clearances for finishing and services. Keep the first-pack sample for comparison to the remainder of the shipment.
Key takeaway, treat bridging clip details as a small but critical subsystem. Require CAD, datasheets and clear fastener guidance, and run a trial install before full acceptance. If a supplier will not provide CAD or explicit load or finish information, ask why and consider alternatives.
For product specifics, sample kits or shop drawings see the Dass Metal bridging clip page. For general clip type comparisons and fixing guidance see a quick guide to beam clips and a typical bridging clip data sheet for expected technical fields: Walraven beam clips guide, and a sample data sheet from an industry supplier DCM Metal bridging clips data sheet. For supplier selection best practice see the Government of Canada consumer checklist for supplier choice consumer checklist.
Dass Metal Products can supply datasheets, CAD files and sample kits to support mock-up and specification review. Contact your Dass Metal representative to request shop drawings or a trial kit before you place the production order.
