

C channel framing is the use of cold-formed, C‑shaped steel channels to brace studs, level substrates, and carry loads in walls, ceilings, and partitions. It delivers straight lines, fast installation, and predictable performance for projects across Canada and the United States. Contractors use it for bridging, furring, and resilient assemblies that meet code.
By Navjot Dass • Last updated: 2026-07-04
Start Here: What You’ll Learn
This guide explains what C channel framing is, why it matters, and exactly how to design and install it. You’ll see common channel types, spacing rules, best practices, and real examples. We’ll also link to engineering resources so your submittals, schedules, and inspections move faster.
- Plain-language definition and purpose of C channel framing
- Where channels fit in steel stud systems (bridging, furring, resilient)
- Design rules of thumb: gauges, spans, spacing, connectors
- Installation workflow from layout to inspection
- Channel types compared: carrying/bridging, furring, resilient, track
- Field-tested best practices that reduce rework
- Engineering resources, load tables, and documentation tips
At a Glance
C channel framing uses C‑shaped sections to control studs, flatten substrates, and transfer loads. Typical spacing is 16 or 24 inches on center, with bridging channels installed every 48 inches vertically for nonstructural walls. The result is straighter walls, quieter rooms, and faster finishes.
- Primary uses: Lateral bracing (bridging), substrate leveling (furring), acoustic decoupling (resilient)
- Common sizes: 1-1/2 in, 2-1/2 in, 3-5/8 in face widths; 25–16 gauge thickness range
- Typical spacing: 16 in or 24 in o.c.; bridging rows at ~48 in intervals
- Fasteners: Self-drilling screws (#8 x 1/2 in typical) with listed connectors
- Compatibility: Works with standard track, slotted deflection track, and clips
What Is C Channel Framing?
C channel framing is a cold‑formed steel method that uses C‑shaped channels to brace studs, flatten surfaces, and carry distributed loads. Contractors pair it with studs and track to stabilize walls, improve finish quality, and meet acoustic or deflection requirements on commercial and residential builds.
In steel stud systems, a C channel is a roll‑formed profile with a web and two flanges. The shape resists twisting, makes fast screw connections, and creates a reliable plane for gypsum, ceilings, and cladding. You’ll see it in walls, bulkheads, and plenum ceilings.
At Dass Metal Products, C channel framing complements our interior and exterior systems—supporting non load bearing partitions, load bearing stud framing, and acoustic assemblies. Our engineering team aligns gauges and spans with stud height, spacing, and the finish you plan to hang.
- Carrying/bridging channel: Runs horizontally between studs to control flanking and keep studs plumb.
- Furring channel: Creates a flat plane for board or panels over uneven substrates and services.
- Resilient channel: Decouples gypsum for sound attenuation in multifamily and healthcare rooms.
- Track interfaces: Standard and slotted deflection track accept stud movement while holding layout.
Because channels are factory‑formed, dimensions are consistent. That consistency shortens layout time and helps tapers achieve Level 4–5 finishes without heavy skim coats.
Why C Channel Framing Matters
C channel framing improves straightness, controls stud rotation, and speeds finishing. It also supports acoustic goals by decoupling drywall and helps meet deflection and drift requirements with the right track and clip details. The payoff is fewer callbacks and a cleaner inspection.
Why should builders care? Straight framing reduces board waste and touch‑ups. Lateral bracing limits stud “oil‑canning,” so walls don’t telegraph waves under angled light. And resilient mounting breaks vibration paths that carry sound through assemblies.
As a Canadian manufacturer serving projects in both Canada and the United States, Dass Metal Products emphasizes code‑aligned solutions. Our CSSBI‑certified processes and 40+ years of engineering experience focus on getting you submittal‑ready details that pass review and work in the field.
- Straighter walls: Bridging rows at ~48 in keep studs aligned over the full height.
- Faster board: A consistent plane means faster boarding and fewer butt‑joint issues.
- Acoustics: Resilient channels and sealants can reduce room‑to‑room sound transfer when detailed properly.
- Deflection: Slotted deflection track allows 1/2–1 in of vertical movement without damaging finishes.
- Documentation: Clear drawings, product data, and load tables streamline approval and inspection.
If you’re new to cold‑formed methods, our overview of cold‑formed metal framing explains how lightweight steel delivers predictable spans and interfaces. For a deeper look at bracing theory, see our internal bridging channel guide.
How C Channel Framing Works
C channels control geometry and carry distributed loads. Installed horizontally as bridging, they restrain stud flanges against buckling. As furring, they create an even plane for finishes. With the correct track and clips, channels let walls move for deflection while protecting gypsum and joints.
Think of channels as “seatbelts” for studs and “shims” for finishes. In partitions, a row near mid‑height resists minor lateral loads and keeps studs from rotating. On ceilings or shafts, furring spans between supports to provide a flat fastening line for board.
Typical workflow pairs 16 or 24 in stud spacing with bridging rows every 48 in. Installers fasten channels with listed screws or clips that match gauge and environment. Where floors move, slotted deflection track or slide clips preserve a 1/2–1 in gap for drift.
| Step | What happens | Who owns it | Key numbers |
|---|---|---|---|
| 1. Layout | Mark track lines, stud spacing (16/24 in o.c.), and channel rows (~48 in up the wall). | Lead framer | Laser, chalk, tape to 1/16 in |
| 2. Track | Set standard or slotted deflection track; fasten per spec; leave movement gap. | Framing crew | 1/2–1 in vertical slot |
| 3. Studs | Plumb studs; verify crown; lock top/bottom positions. | Framing crew | Plumb within 1/8 in over 10 ft |
| 4. Channels | Install bridging or furring; screw or clip at each stud. | Framing crew | #8 x 1/2 in screws typical |
| 5. QA/QC | Check spacing, fastener counts, and gaps before boarding. | Foreman/GC | Fasteners at every stud |
Want a step‑by‑step refresher on common mistakes to avoid before boarding? Our team compiled field lessons in this drywall framing article.
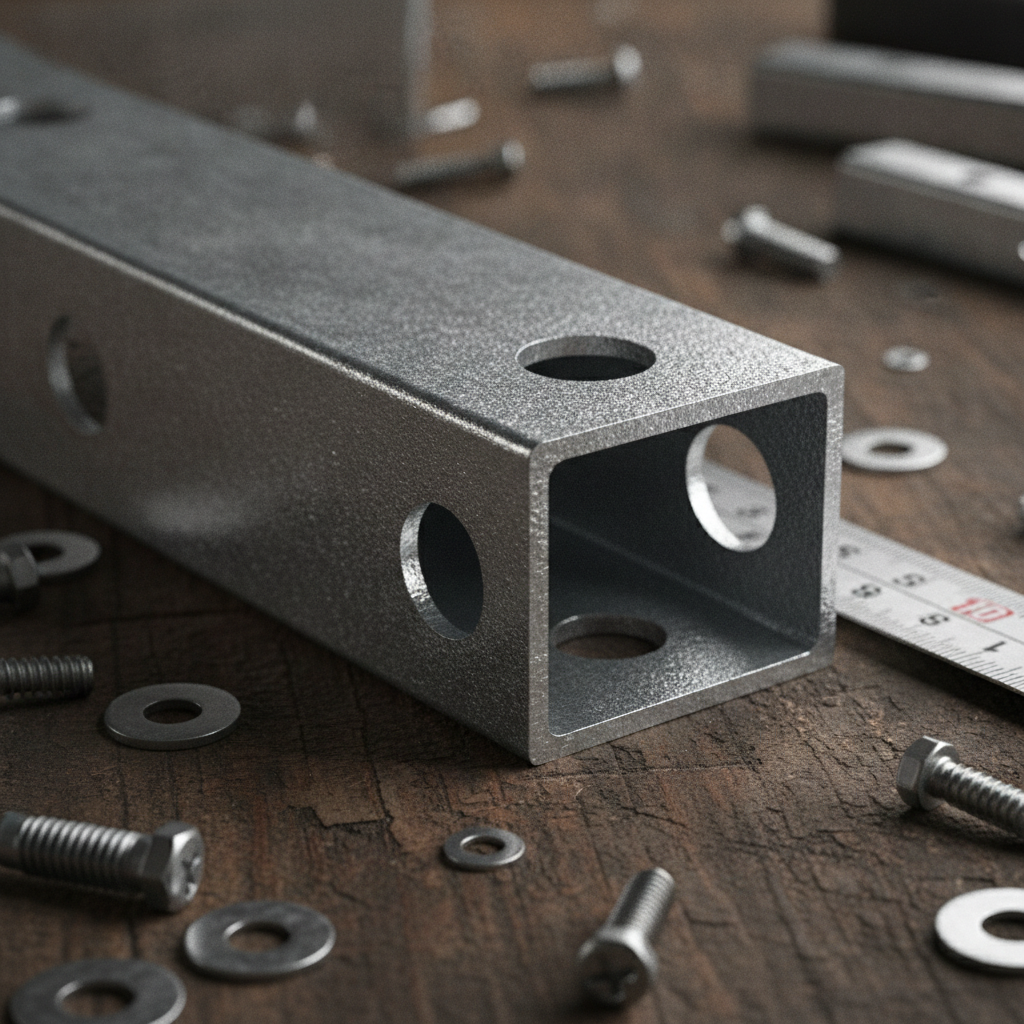
Types of Channels and Methods
Most C channel framing falls into three buckets: bridging/carrying channels for lateral control, furring channels to create a flat plane, and resilient channels to decouple gypsum for sound. Track profiles—standard, deep, and slotted—complete the system by guiding studs and allowing deflection.
Carrying/Bridging Channel
- Purpose: Prevents stud rotation and keeps walls straight under minor lateral loads.
- Placement: Often every ~48 in vertically; add rows for tall or high‑traffic partitions.
- Connection: Screws or listed clips at each stud; avoid over‑driving to preserve capacity.
- Example in practice: Mid‑corridor walls at 24 in o.c. receive two rows—at 48 in and 96 in—to maintain plane under foot‑traffic pressure.
For published dimensions and options, review the bridging/carrying channel specs. When you need design rationale and coordination notes, our in‑depth bridging channel guide covers field sequencing and inspection tips.
Furring Channel (Hat/Furring)
- Purpose: Levels uneven substrates and provides a fastening line for gypsum and panels.
- Typical span: Short spans between supports; match gauge to board weight and spacing.
- Common spacing: 16 in or 24 in o.c. depending on board thickness and orientation.
- Example in practice: Over concrete or masonry, furring evens surfaces so board seams land cleanly and reveals stay true.
Explore profiles and gauges on our furring channel profile details. If you’re designing layered systems, our internal furring channel guide explains fasteners, shims, and sequencing around MEP.
Resilient Channel
- Purpose: Decouples board from framing to reduce sound transmission.
- Orientation: Flange faces must follow manufacturer direction; wrong orientation collapses performance.
- Fasteners: Board screws must not penetrate studs; keep to channel only to preserve decoupling.
- Example in practice: In multifamily, resilient channels paired with sealant lines around perimeters noticeably cut through‑wall sound when installed correctly.
Our acoustic line integrates resilient components with studs and sealants, giving designers predictable assemblies that are easier to enforce in the field.
Track Interfaces: Standard, Deep, and Slotted Deflection
- Standard track: Guides studs at floor and ceiling; common for non load bearing partitions.
- Deep track: Adds flange height for tall studs or where extra screw purchase is needed.
- Slotted deflection track: Allows vertical movement (often 1/2–1 in) for drift or slab deflection without cracking gypsum.
- Example in practice: Perimeter walls near curtainwall get slotted track to tolerate floor movement, while interior cores use standard track.
New to nonstructural design? This non‑structural metal framing overview clarifies where slip details belong and how control joints interact with deflection gaps.
Clips, Connectors, and Accessories
- Deflection clips: Connect studs to structure while preserving vertical slip.
- Bridging clips: Speed channel install with consistent edge distance and screw counts.
- U‑Flex and specialty track: Curved walls and tight radii benefit from segmented, flexible track profiles.
- Example in practice: In lobbies with curved feature walls, U‑Flex simplifies layout and keeps board backing continuous.
| Profile | Primary function | Typical thickness | Common spacing |
|---|---|---|---|
| Bridging/Carrying Channel | Lateral bracing of studs | 25–20 ga | Rows ~48 in apart |
| Furring Channel | Leveling and fastening plane | 25–22 ga | 16 or 24 in o.c. |
| Resilient Channel | Acoustic decoupling | 25–22 ga | 16 or 24 in o.c. |
| Standard/Deep Track | Guides studs; screw purchase | 25–16 ga | Matches stud layout |

Best Practices for Design and Install
Lay out channels with the finish in mind, match gauge to span and board weight, and use listed connectors at every stud. Keep movement gaps clean, follow orientation rules for resilient channel, and document spacing and fastener counts before inspection.
Design Smart
- Calibrate spacing to finish: 16 in o.c. supports heavier finishes and abuse‑resistant board; 24 in o.c. speeds coverage with standard gypsum.
- Pick gauges consciously: 25 ga for light furring; 22–20 ga where spans increase or impact is likely.
- Detail movement: Show 1/2–1 in slip at heads near drift zones; specify sealant at board perimeters.
- Plan access: Keep rows clear of MEP conflicts; shift a row up/down a few inches to avoid rework.
Install Clean
- Mark heights: Snap a level line for each row; check to 1/16 in with a laser before fastening.
- Fasten consistently: One screw per stud for bridging rows unless design calls for more; do not over‑drive.
- Respect orientation: Resilient channel must face the correct way; board screws go to channel only.
- Preserve slip: Do not fill deflection slots with compound or blocking; leave the gap clear.
Document for Speed
- Submittal binder: Include data sheets, shop drawings, and a one‑page install sequence with photos.
- Inspection checklist: Note spacing, fastener counts, and movement gaps; sign off before boarding.
- Punchlist ready: Photograph rows and terminations; it shortens conversations later.
For system‑level context, our structural framing systems overview ties channels to studs, track, and clips across typical building zones.
Share your wall heights, stud spacing, and intended finishes. Our engineering team can suggest gauges, row counts, and compatible clips so your first inspection passes smoothly.
Tools and Engineering Resources
Use a laser, 25‑ft tape, and self‑leveling line tools for layout, then cordless drivers with depth stops for fastening. For engineering, rely on product data sheets, load tables, and shop drawings bundled into a clear submittal set your AHJ can review quickly.
- Field tools: Laser, chalk line, 25‑ft tape, impact driver with clutch, aviation snips, and PPE.
- Measuring and QC: Torpedo level, plumb bob or digital level, screw gauges for over‑drive checks.
- Engineering resources: Product brochures, load tables (imperial and metric), and MSDS sheets.
- Submittal components: Cover sheet, data sheets, shop drawings, sequence notes, and sample photos.
Diving deeper on channels? Our internal primer on channel studs connects profiles, gauges, and best‑fit applications across partitions and ceilings.
Case Studies and Real‑World Examples
C channel framing shines where straightness, speed, and acoustic control matter. The snapshots below show how bridging, furring, and resilient layouts reduce rework and improve finish quality across corridors, tenant fit‑outs, and healthcare spaces.
Corridor Retrofit with Bridging Rows
A renovation team faced wavy existing studs along a long corridor. Installing two rows of bridging channels at 48 in and 96 in brought the wall into plane. Board crews reported faster fastening, and reveal trims aligned without extra shimming.
- Stud layout: 24 in o.c. nonstructural
- Bridging: Two rows, screw‑attached at each stud
- Outcome: Reduced touch‑ups and cleaner painter’s light
Tenant Fit‑Out Using Furring Channel
New finishes needed to land over uneven masonry. Crews set furring at 16 in o.c., shimming minor dips. The final wall read laser‑straight, and millwork installed flush without scribing.
- Furring spacing: 16 in o.c.
- Board type: 5/8 in gypsum
- Outcome: Level plane for fast board and tight millwork
Multifamily Acoustic Upgrade with Resilient Channel
Sound complaints between units prompted a decoupled assembly. Resilient channels were oriented per instructions, and board screws stayed out of studs. Post‑completion walk‑throughs confirmed noticeably quieter rooms.
- Resilient spacing: 24 in o.c. on studs
- Sealant: Continuous perimeter beads
- Outcome: Reduced perceived sound transfer
Perimeter Deflection with Slotted Track
Near an exterior curtainwall, engineers expected slab movement. Slotted deflection track allowed 3/4 in vertical slip. The finished wall remained crack‑free through temperature swings and tenant move‑ins.
- Expected movement: 3/4 in slip
- Stud spacing: 16 in o.c.
- Outcome: Protected joints and finished edges
Frequently Asked Questions
Here are concise answers to common questions about C channel framing, from spacing and gauges to the difference between furring and resilient channel. Use these for quick coordination and submittal notes.
What spacing should I use for bridging channels?
For many nonstructural partitions, place bridging rows about every 48 inches vertically, with studs at 16 or 24 inches on center. Tall walls or impact zones may need additional rows based on engineering direction.
When do I choose furring channel over resilient channel?
Use furring channel when you need a flat, continuous plane for finishes over uneven substrates. Choose resilient channel when your priority is sound control and decoupling drywall from the studs. Some assemblies combine both for different zones.
How much vertical movement should slotted deflection track allow?
Many designs allow 1/2 to 1 inch of vertical slip to accommodate slab deflection and drift. Follow the specified slot length and keep the gap free of compound or blocking so the assembly can move as intended.
What gauges are common for C channels?
Light furring and resilient channels are often 25 to 22 gauge. Bridging channels used for lateral control commonly range from 25 to 20 gauge. Increase thickness with span length, impact risk, or heavier finishes.
Key Takeaways
Focus on straightness, spacing, and slip. Choose the right channel for the job, follow orientation rules, and document your layout and fasteners. That combination produces cleaner finishes, quieter rooms, and fewer callbacks.
- C channel framing controls studs, levels planes, and decouples finishes.
- Common numbers: 16/24 in stud spacing, rows ~48 in apart, 1/2–1 in slip.
- Use listed clips and correct screw sizes; avoid over‑driving.
- Coordinate channels with MEP and expansion joints early.
- Bundle data sheets and drawings for fast approvals.
Conclusion
C channel framing is a fast, reliable way to deliver straighter walls and better acoustics. Pair the right profile with correct spacing, gauge, and connectors, and your finishes will look cleaner while inspections go quicker.
Dass Metal Products manufactures and supplies the studs, tracks, channels, clips, and acoustic components contractors depend on—supported by engineering resources and timely delivery across Canada and the United States. If you’d like a submittal‑ready package for your next partition, our team is ready to help.
Let’s talk details. Share wall heights, stud spacing, target acoustics, and schedule constraints. We’ll recommend gauges, channel rows, and compatible clips so your crew installs once and moves on.
For product‑level information used by specifiers and installers, see the bridging/carrying channel specifications, the furring channel profile details, and our non‑structural metal framing overview.
