Framing using metal studs is the disciplined assembly of light- or heavy-gauge cold-formed steel studs, tracks, and channels to build straight, durable walls, ceilings, and soffits. It relies on precise layout, correct fasteners, and proper bracing to meet code. For projects in 370 New Enterprise Way and across North America, Dass Metal Products supplies engineered components and expert guidance.
By Navjot Dass — Dass Metal Products | Last updated: 2026-05-15
Above the Fold: Why This Guide Matters + Table of Contents
This complete guide shows you how to deliver straighter, safer walls with metal studs—without rework. You’ll learn when to choose steel, how to plan gauges and spacing, how to detail deflection and openings, and which tools and resources keep inspections smooth and schedules on track.
Use this page as your on-site reference. It’s written for superintendents, foremen, and estimators who want predictable results with steel framing.
- What is framing using metal studs?
- Why metal studs matter on modern jobs
- How metal stud walls are built
- Types, methods, and approaches
- Best practices that prevent call-backs
- Tools and resources
- Metal vs wood: quick comparison
- Field-tested examples
- FAQ
- Key takeaways
What Is Framing Using Metal Studs?
Framing with metal studs is the process of assembling C-shaped steel studs within U-shaped tracks to create non-load-bearing partitions and load-bearing walls. Performance depends on stud depth, gauge, spacing, and bracing. Proper connections, deflection details, and acoustic components complete a code-compliant wall system.
At its core, metal stud framing uses standardized profiles that install quickly and stay straight. Unlike wood, steel doesn’t warp or shrink. Studs typically install at 16 or 24 inches on center, with depths such as 3-5/8 inch, 6 inch, and 8 inch common. Non-load-bearing partitions usually use light gauge; structural and tall walls use heavier gauges with engineered bridging.
If you’re new to steel, our team in Vaughan manufactures and supplies a complete system—studs, tracks, channels, clips, and drywall finishing trims—supported by load tables and submittals. For an overview of how cold-formed systems come together, see our comprehensive cold-formed guide.
Why Metal Studs Matter on Today’s Jobsites
Metal studs deliver dimensional stability, noncombustibility, and predictable performance. They resist moisture-related movement, accept precise fasteners, and integrate with acoustic and fire-rated assemblies—helping crews hit tolerances, pass inspections, and reduce rework.
Builders choose steel for consistency and compliance. Steel studs arrive uniform in shape, with service holes and knockouts that speed MEP routing. Because steel is noncombustible, it supports fire-rated assemblies without the variability of wood. In high-traffic interiors, metal studs keep gypsum surfaces flatter, reducing finish waves that show under raking light.
Time pressures are real. Crews need components that cut cleanly and fasten reliably. Pre-punched service holes, standard 1-1/4 inch and 1-5/8 inch self-drilling screws, and slotted deflection track all reduce friction. For a current snapshot of industry drivers, review our perspective in steel framing benefits in 2026.
How Metal Stud Framing Works (Step-by-Step)
Plan gauges and spacing from wall height, loads, and finishes; snap chalk lines; anchor tracks; cut and seat studs; fasten per pattern; add bridging and deflection details; frame openings; verify plumb and straight; then board. Each step protects tolerance and code compliance.
Here’s the practical sequence our field teams trust for framing using metal studs on interior partitions and tall walls alike.
1) Plan the assembly
- Confirm wall height and use: Match stud depth and gauge to span and loads (for example, 3-5/8 inch 20 gauge at 16 inches o.c. for typical partitions; deeper/heavier for tall walls).
- Account for movement: Use slotted deflection track at the head so the structure can move vertically without stressing gypsum.
- Choose acoustics: Add resilient channel and batt insulation to boost STC where privacy matters.
2) Lay out and anchor tracks
- Snap straight lines: Use rotary lasers and chalk to keep tracks aligned.
- Anchor base track: Use approved concrete anchors at specified spacing; keep fasteners clear of sawcuts.
- Install head track: Use standard, deep, or slotted track to match the detail and tolerance you need.
3) Cut, seat, and fasten studs
- Cut cleanly: Aviation snips work for light gauge; a chop saw with a metal blade speeds repetition on heavy gauge.
- Seat fully: Ensure studs are tight to the track web before fastening.
- Fasten per pattern: Typical stud-to-track patterns use two screws per flange; confirm your submittals.
4) Stiffen and detail
- Bridging/carrying channel: Add rows at mid-height for walls over ~10 feet; use bridging clips for speed.
- Openings: Pre-frame door and window rough openings with back-to-back jamb studs and headers sized to span.
- MEP: Route through service holes; protect edges with grommets when required.
5) QA and board
- Check plumb and straight: Shim as needed; correct any twist before boarding.
- Gypsum installation: Follow screw patterns; float joints; keep board edges off slabs by ~1/2 inch.
- Seal perimeters: At acoustic walls, continuous sealant at top and bottom tracks preserves STC.
For a deeper construction overview, see this structural metal stud framing guide that complements the interior sequence above.
Types, Methods, and Approaches
Most interiors use non-load-bearing light-gauge studs; tall or structural walls require heavy-gauge studs with engineered bridging. Track selection—standard, deep, or slotted—controls tolerance and movement. Channels, clips, and acoustic components complete the assembly.
Dass Metal Products manufactures a comprehensive system so you can match components to the job—no improvisation on site. Here’s a quick map:
Core studs and tracks
- Non Load Bearing Steel Studs (Light Gauge): Partitions, soffits, bulkheads; quick to cut and install.
- Load Bearing Stud Framing (Heavy Gauge): Structural and tall walls; pairs with engineered bridging and headers.
- Standard Track: Go-to for most base and head conditions; clean, efficient.
- Deep Track: Extra tolerance for framing variances and substrate irregularities.
- Slotted Deflection Track: Allows vertical building movement at the head without cracking finishes.
Stiffeners, acoustics, and connectors
- Bridging/Carrying Channel: Controls stud rotation and deflection on tall spans.
- Resilient Channel: Improves STC and helps reduce screw pops from minor movement.
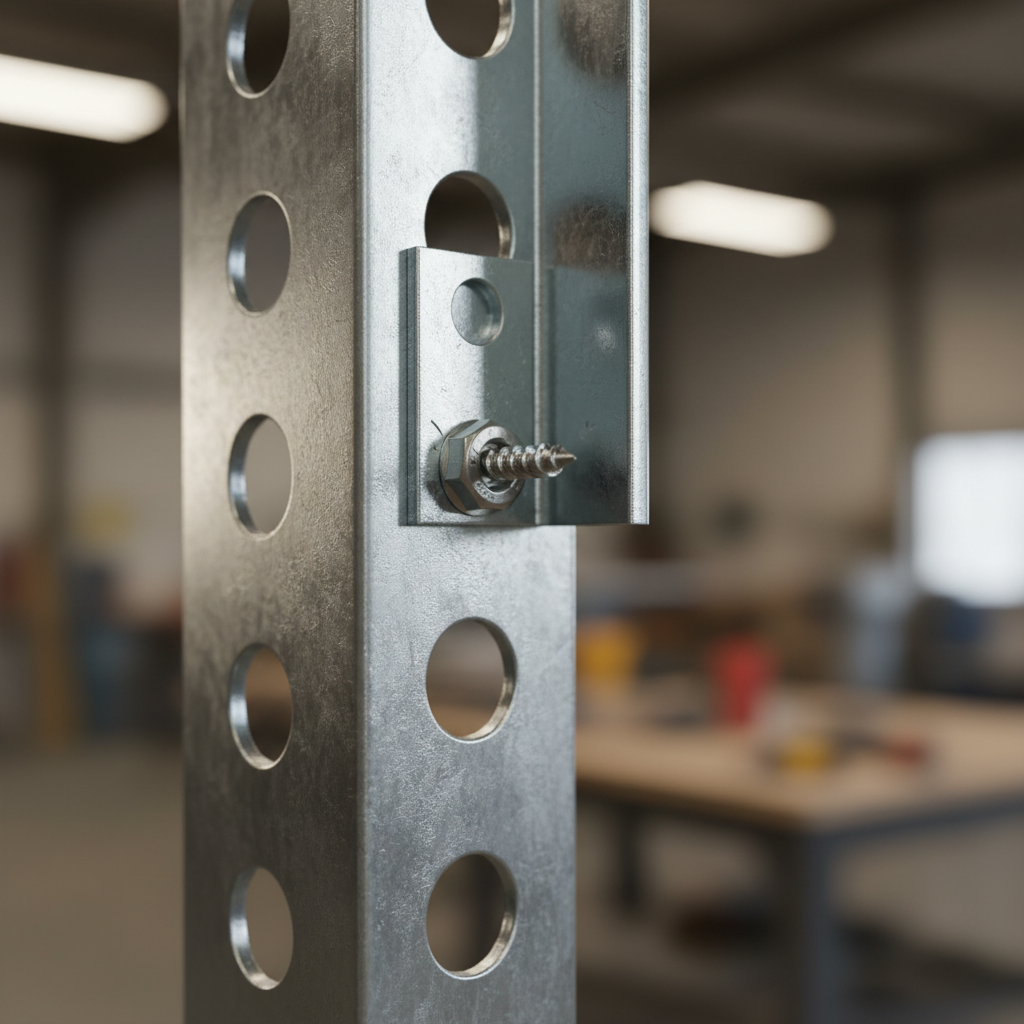
- Clips: Deflection side clip, webslide clip, and bridging clip speed consistent connections.
- Accessories: Windbrace, U-Flex track, furring channel, L track, Z-Bar, L/J trims, J track, utility angles, flat strips, hanger/tie wire.
When you need a refresher on part selection, bookmark our drywall and metal studs guide and this quick overview of using steel studs.
Best Practices That Prevent Call-Backs
Use the right gauge and spacing for the span, add bridging on tall walls, allow head-of-wall movement, and pre-frame openings. Verify plumb and straight before boarding. These steps protect finishes, doors, and glazing—and keep inspectors moving.
After 40+ years in steel framing, we’ve found the same habits separate problem-free walls from punch-list headaches. Build with these checkpoints in mind.
Layout and materials
- Confirm tolerances up front: Choose deep track if slab flatness is variable; it buys you essential adjustment range.
- Pick spacing for finishes: Heavy tile, stone, or abuse-rated panels usually justify 16 inches o.c. spacing.
- Document gauges: Keep a printed spec and submittal set in the gang box to eliminate guesswork.
Deflection and movement
- Always separate structure from finishes: Use slotted deflection track or deflection clips at the head; avoid hard-fixing studs to structural members where movement is expected.
- Seal acoustic perimeters: A continuous bead at base and head tracks helps preserve STC.
Bridging and openings
- Bridging rows: Add rows at mid-height for walls above ~10 feet; two rows for very tall spans per engineering.
- Door frames: Back-to-back jamb studs and properly sized headers prevent hinge binding later.
Fasteners and QA
- Right screws, right places: Use self-drilling framing screws; save drywall screws for board only.
- Check plumb and crown: Correct twists before board goes up; it’s faster than skim-coating flaws later.
- Protect penetrations: Use grommets or bushings in service holes where required by spec.

Need a second set of eyes? Our engineering team reviews gauges, spans, and deflection details daily. Share your wall schedule and we’ll flag risks before they reach the field. Start with this quick primer on avoiding framing mistakes.
Tools and Resources
Successful metal stud framing depends on clean layout, accurate cuts, and verified specs. Use lasers and chalk for alignment, rated screws for connections, and manufacturer load tables for gauge selection. Keep submittals and MSDS on site to streamline inspections.
Crews move faster when the right tools and documents are staged before layout.
- Layout: Rotary/line lasers, chalk lines, and tape measures for straight, square tracks.
- Cutting: Aviation snips for light gauge; chop saws with metal blades for repeatable heavy-gauge cuts.
- Fastening: 1-1/4 inch and 1-5/8 inch self-drilling screws for stud-to-track and stud-to-stud connections.
- References: Load tables, submittal sheets, and MSDS keep everything code-aligned and inspection-ready.
Estimators and PMs often ask where to start. This concise explainer on how metal stud framing is estimated outlines quantities and typical patterns you can adapt to your project.
Local considerations for 370 New Enterprise Way
- Plan deliveries around regional weather swings and busy season schedules so interior framing stays sequenced with drywall and MEP rough-ins.
- Winter conditions can drive humidity shifts; prioritize resilient channel and perimeter sealant in spaces that need stable acoustics.
- Coordinate cross-border shipments early for U.S.-bound jobs; our team supports documentation so materials hit your site when needed.
Metal vs Wood: Quick Comparison
Metal studs are straight, noncombustible, and dimensionally stable; wood studs are familiar, readily available, and nail fast. For commercial interiors, steel usually wins on tolerance and fire assemblies. For small residential work, wood can be practical when speed and tooling dominate.
When you must justify a framing approach, use this side-by-side summary.
| Factor | Metal Studs | Wood Studs |
|---|---|---|
| Combustibility | Noncombustible; supports fire-rated details | Combustible; requires added fire protection |
| Dimensional stability | Does not warp or shrink with humidity | Can cup, twist, or shrink over time |
| Weight & handling | Lighter bundles; consistent profiles | Heavier per stud; variable quality |
| Fastening | Self-drilling screws; precise patterns | Nail or screw; risk of splits at ends |
| Acoustics | Pairs well with resilient channel | Works with channels; more variability |
| Common spacing | 16 or 24 inches o.c. | 16 or 24 inches o.c. |
| Best fit | Commercial interiors, tall partitions | Small residential, simple partitions |
For a deeper dive into your specific use case, see our notes on when steel studs beat wood and our practical basement framing guide.
Case Studies and Field Examples
Real projects show where details pay off: resilient channels that raise STC, slotted head-of-wall tracks that prevent cracks, and mid-height bridging that preserves door alignment. These repeatable moves cut punch lists and protect schedules.
Here are condensed, anonymized examples drawn from recent customer work our team supported.
Tenant improvement: fast partitions with clean finishes
- Scope: New office partitions and soffits across multiple floors.
- Assembly: Light-gauge studs at 16 inches o.c., resilient channel on tenant demising walls, standard track at base and slotted deflection track at head.
- Result: Boarded surfaces stayed flat under raking light; ceiling transitions remained crack-free after building movement.
School corridor: tall partitions that stay straight
- Scope: Tall interior corridor walls near 14 feet clear height.
- Assembly: Deeper, heavier-gauge studs with two rows of bridging channel; door frames with back-to-back jamb studs.
- Result: Door hardware aligned through seasonal shifts; inspection sign-off came without rework.
Healthcare suite: fixtures and acoustics
- Scope: Exam rooms and procedure areas needing privacy and backing for fixtures.
- Assembly: Gauge upgrades at fixture bays; resilient channel plus insulation; perimeter sealants for STC control.
- Result: Sound isolation met owner expectations; anchors held equipment without deflection issues.
Looking for quick wins you can apply right now? Our field note collection on avoiding framing mistakes covers the ten issues we see most.
Frequently Asked Questions
These concise answers cover the questions crews ask most on site—from spacing and screws to acoustics and movement. Share them during startup meetings so everyone builds the same way.
What spacing should I use for interior metal stud walls?
Most interiors use 16 inches on center for straighter finishes and heavy surfaces; 24 inches on center can work where allowed by spec and finish requirements. Match spacing to wall height, stud depth, and the weight of doors, tile, or millwork.
How do I handle building movement at the head of wall?
Use slotted deflection track or tested deflection clips so the structure can move vertically without cracking finishes. Don’t hard-fix studs to the structure at the head where movement is expected.
Do I need special screws for steel studs?
Yes. Use self-drilling framing screws sized to your gauge for stud-to-track and stud-to-stud connections. Reserve drywall screws for attaching gypsum only, following the specified pattern.
Can metal studs improve acoustics?
Paired with resilient channel, batt insulation, and perimeter sealant, metal stud walls can reach higher STC ratings than basic partitions. The key is decoupling gypsum and sealing perimeters to prevent flanking paths.
Key Takeaways
Plan gauges and spacing from spans and finishes, allow head-of-wall movement, add bridging on tall walls, and use the right screws. Keep submittals handy and check plumb before boarding. These habits make framing using metal studs predictable and inspection-ready.
- Metal studs stay straight and support consistent finishes.
- Slotted tracks and deflection clips prevent cracks from movement.
- Bridging preserves alignment on tall partitions.
- Acoustic walls need resilient channel and perimeter sealant.
- Field QA—plumb, straight, and fastener checks—pays off at handover.
Conclusion
Metal stud framing succeeds when you match components to spans and details, then install with disciplined layout and fastening. With a complete system and clear submittals, crews move fast and pass inspections the first time.
Dass Metal Products manufactures Canadian-made studs, tracks, channels, clips, and finishing trims—supported by engineering and reliable delivery across Canada and the U.S. If you’re planning interior framing in 370 New Enterprise Way or coordinating work across multiple sites, we can help tailor gauges, profiles, and logistics to your schedule.
Next step: Share your wall schedule for a fast spec check. Or book a discovery session near 370 New Enterprise Way to review spans, deflection details, and acoustic targets with our team.
